I’m currently in a phase of life where my waistline seems particularly hard to control. While I used to go for more fitted silhouettes in my upper body, I knew that this summer, I was going to want more easy-fitting options.
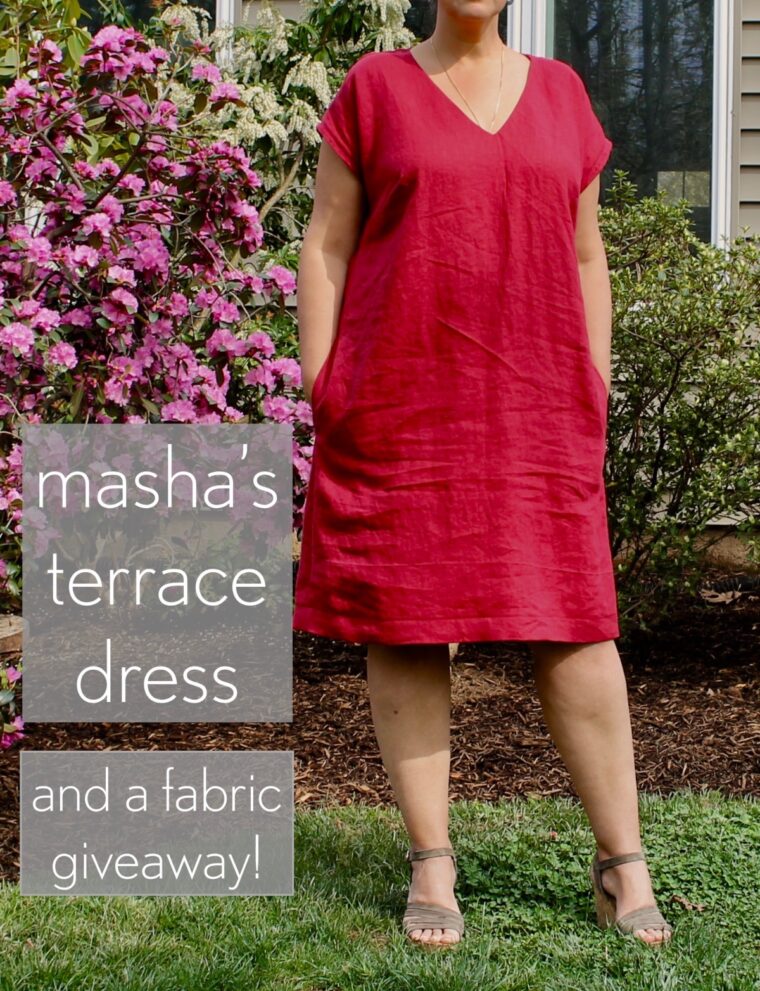
A few months ago, I started dreaming of a breezy, knee-length dress with a deep v-neck. There are a number of loose-fitting dress patterns in the Liesl + Co. catalog: the Cinema Dress, the Gelato Dress, the Camp Dress, and the Weekend Getaway Dress come to mind. But none of them have quite the neckline I had envisioned, so I was going to need to adjust whichever dress I chose. In the end, I settled on the Terrace Dress for its cut-on sleeves (my favorite!) and plain front which would be easy to modify into a v-neck.
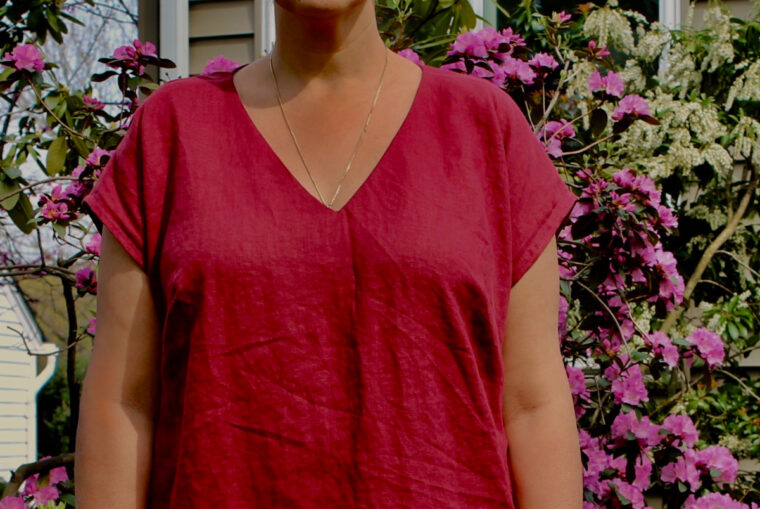
The stars aligned when Fabric Wholesale Direct offered us the chance to try out their fabric. I chose this linen in the wine shade. It was an absolute dream to sew and is gorgeous to wear. Fabric Wholesale Direct is also sponsoring a $100 fabric giveaway for one lucky winner, so keep reading for those details. ***The giveaway is now closed.***
Choosing my size
My current measurements are:
- high bust 38″
- full bust 41″
- waist 32-35″*
- hips 41-42″*
*these measurements seem to depend on the time of day, what I’ve eaten, and how many people have walked their dogs past my house that morning, or at least that’s what it feels like.
Going solely by the size chart, my bust size would put me just over the line into XL, while my waist and hips would be an L. But this pattern does have quite a bit of ease, and I always choose my size based on my high bust, and then do a full bust adjustment (FBA). With that in mind, I ended up going with a M shoulder/bust, graded to an L at the hip.
Initial flat pattern adjustments
I always do several flat pattern adjustments before I trace my pattern onto fabric. These adjustments almost always include a high round back adjustment and an FBA.
Back adjustments
I made a 5/8″ high round back adjustment and a 3/8″ low round back adjustment. I did the low round back adjustment because I need more than 5/8″ adjusted, and that is the maximum you should do for a high round back adjustment. (See our high round back adjustment tutorial here).
Bust adjustment
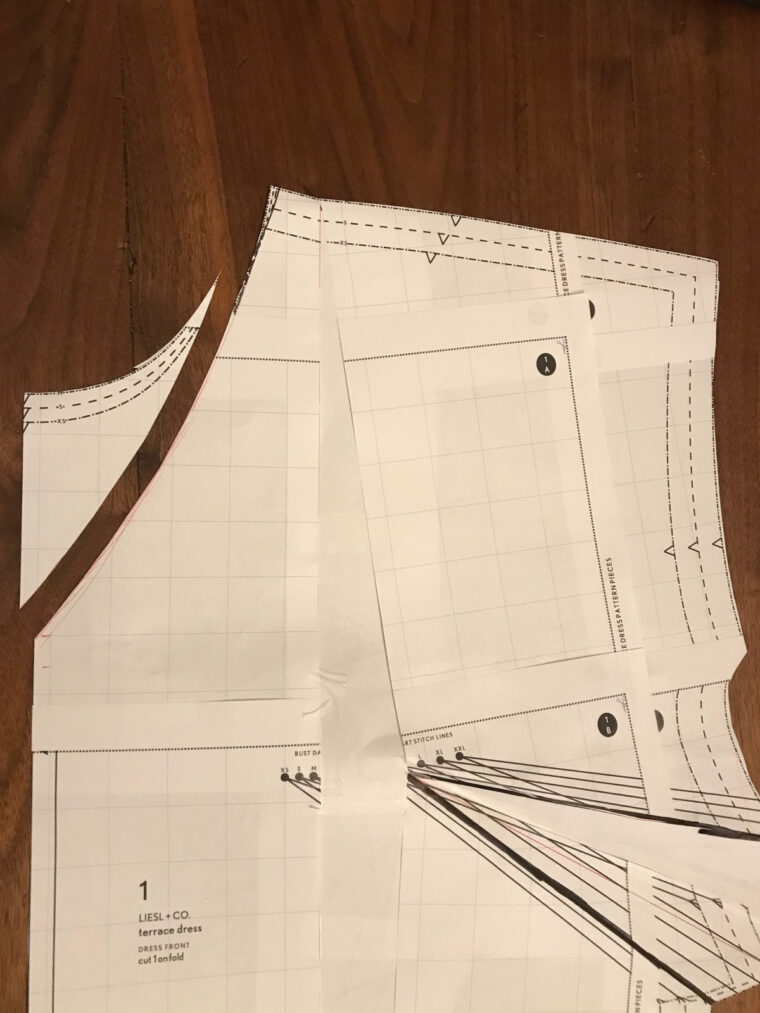
The size M finishes at a 42 1/2″ chest, which would only give me 1 1/2″ of ease. I wanted more, so I made a 1 1/2″ FBA using the instructions included in the pattern. This increased the bust circumference by 3″ total, since the FBA added 1 1/2″ to each side of the bodice. That gave me a total of 4 1/2″ of ease in the bust, which seemed about right.
V-neck modification
While doing my flat pattern adjustments, I also held up the paper pattern to my body and marked where I thought the v neck should end, and then cut out my v shape from the neckline. I used Liesl’s tutorial for modifying a neckline to a v. This is a great, thorough tutorial with lots of suggestions I wouldn’t have thought of myself, including her tip about curving the neckline slightly.
The muslin stage
I’ve written before about the fact that I don’t always make muslins. In fact, I don’t usually make muslins. But in this case, I wanted to confirm in fabric where the v-neck would fall. Too high, and I wouldn’t be happy with the way it looked. Too low, and I would feel uncomfortable in the dress. I wanted to be sure to get it right.
As it turns out, it’s a good thing I made a muslin because I it turned out I needed to fix a few other things, too.
Muslin 1
Here’s the first muslin:
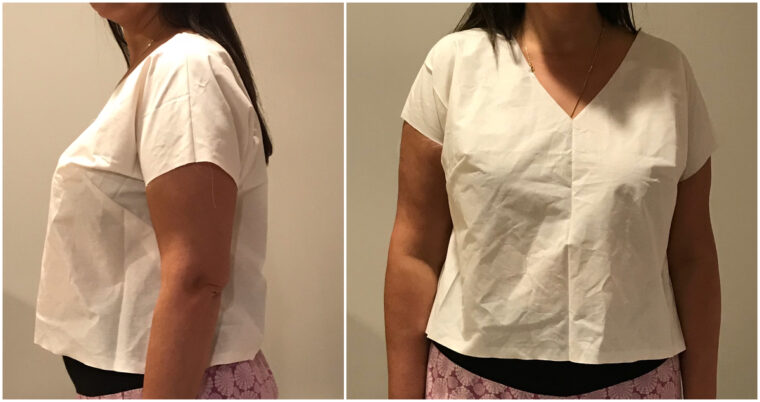 This muslin showed me that:
- I needed to lower my bust dart by about 1″.
- I needed some extra sleeve room. I usually do full bicep adjustments preemptively, but I didn’t think I would need to since this is a cut-on sleeve that appeared to be sufficiently roomy. Good thing I made a muslin.
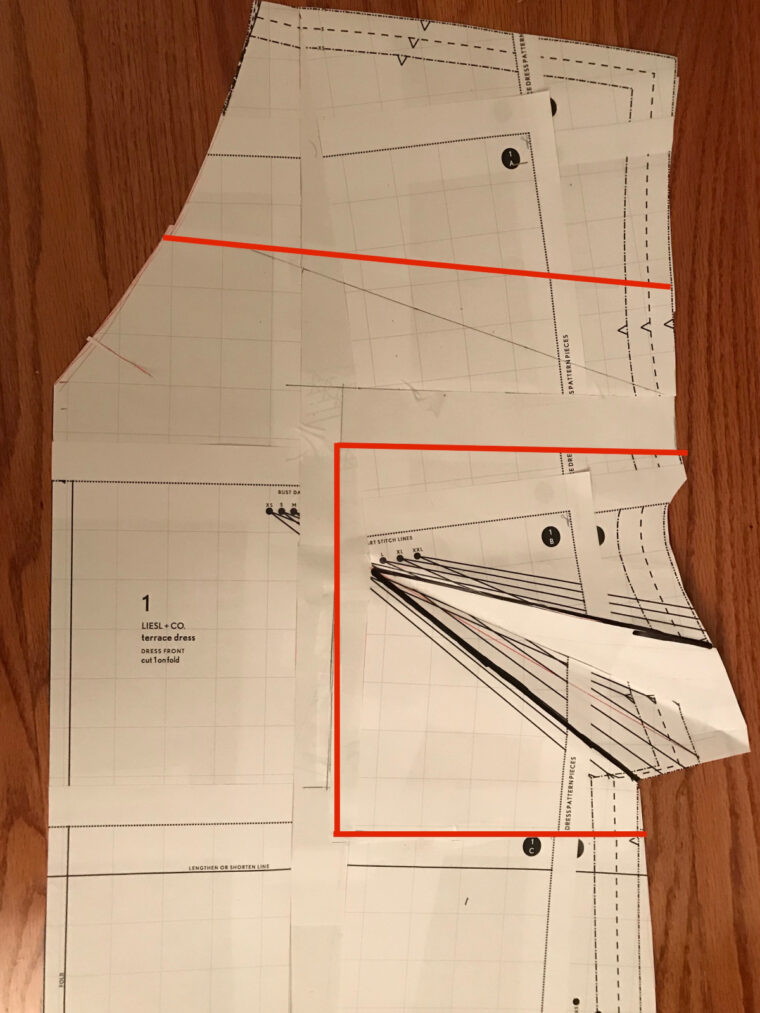
So, I lowered my bust dart. I also lowered the bottom of the sleeve 1″ to give myself more bicep room. I accomplished both fixes with one adjustment, by simply cutting a rectangle from the pattern that included both my dart and the bottom of the sleeve, shifting the rectangle down 1″ and taping it in place, and filling in the gap with paper.
Though the neckline didn’t look like it was going to gape, after making this muslin, I decided to go ahead and remove 1/4″ of length from it to ensure that it would lie flat against my chest. I learned this trick by reading Liesl’s v-neck tutorial. In this photo, you can see my shifted-down rectangle, and the line where I slashed the neckline so that I could overlap it 1/4″.
Muslin 2
I needed to be sure that my sleeve adjustment had worked, so I made another muslin. If you’ve got thick biceps like I do, you may agree that there’s nothing worse than a tight sleeve on a handmade garment.
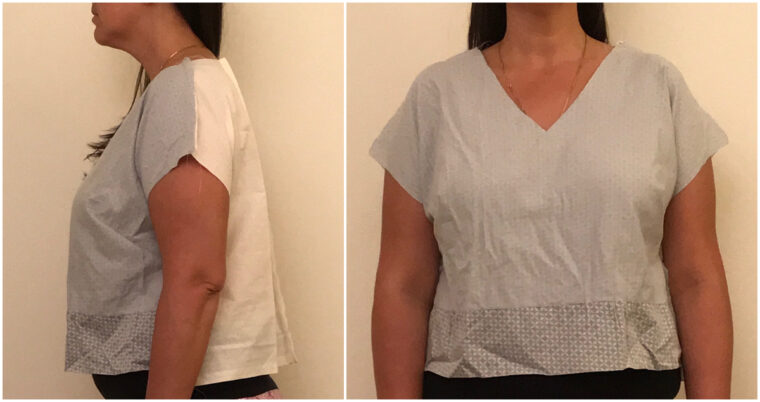
You can see that the sleeves fit much better now. As a result of my second muslin, I realized that:
- My shoulder seam was too far back on my shoulder.
- I wanted the sleeves to be slightly longer.
- I wanted the v-neck to be a bit lower.
- I wanted the back neckline to be slightly higher.
So, I adjusted the shoulder seam forward 1/2″ and lengthened the sleeve 1″. I lowered the v-neck another 3/4″, which made it roughly 4″ lower than the original neckline. And I raised the back neckline a scant 3/8″.
Drafting the facings
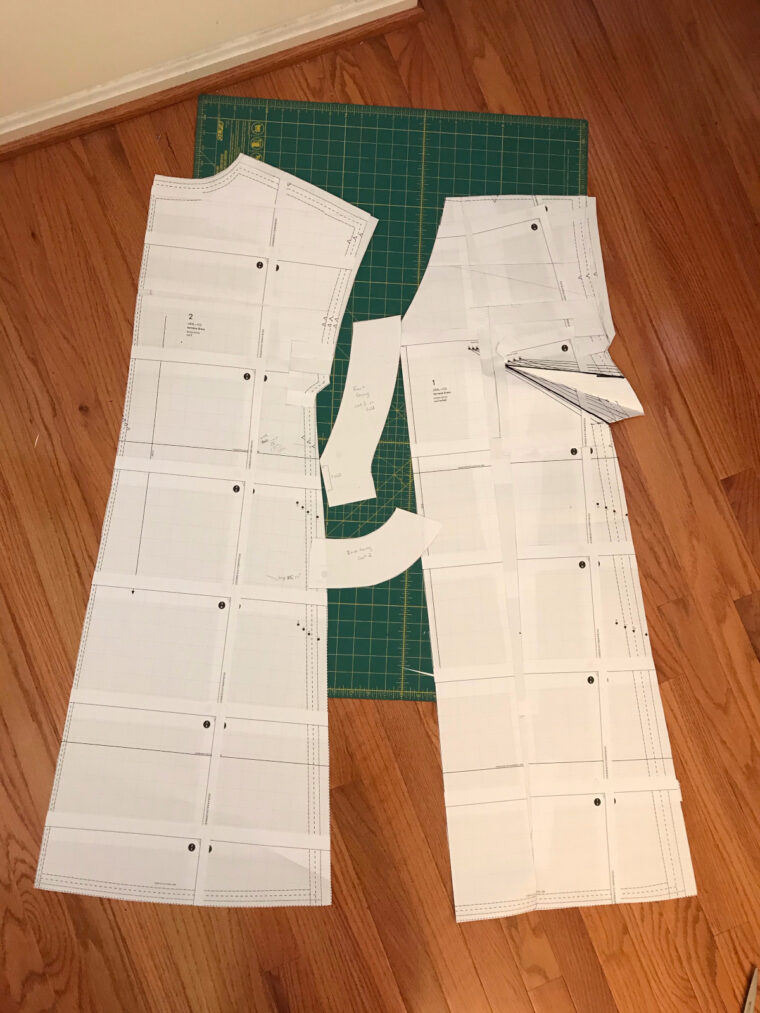
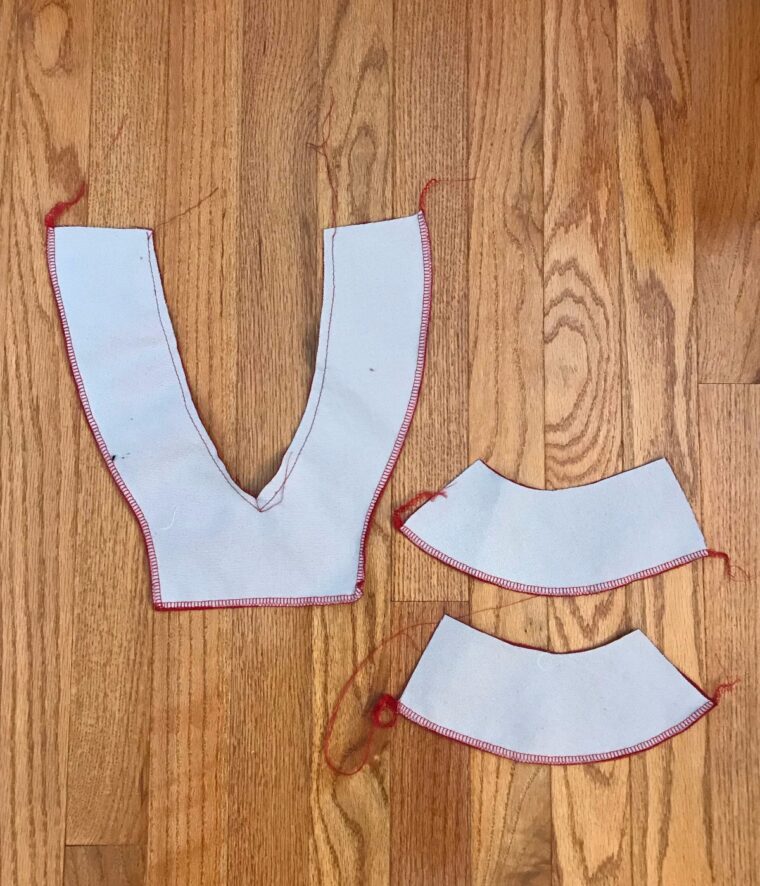
My adjustments completed, it was time to draft neckline facings. The original pattern neckline is finished with bias binding, but that doesn’t work so well on a v-neck. I drafted my facings about 3″ thick by tracing the neckline of the pattern piece on paper. You can see my finished facing pieces in the photo below.
Fabric notes
Before sewing, I washed and dried the yardage from Fabric Wholesale Direct on hot/high as I normally do. I like to beat up my fabric before I sew it, so I usually will wash and dry on hot even if I know I’m not going to do that normally. This way, I know it will stand up to my normal wash routine.
I took the linen out of the dryer immediately after it had finished drying, so that wrinkles wouldn’t set while it was crumpled up. I then smoothed it out, folded it neatly and laid it over my ironing board until I had time to work on the dress a few days later. When I unfolded the linen, it was barely wrinkled at all, save for the creases formed by my folds. I was very pleasantly surprised by this.
Those folds pressed out quite easily. And the fabric has that beautiful linen heft and suppleness while also being breezy to wear. I know I’m going to get tons of wear out of this dress this summer, and I want to order this fabric in three more colors!
Construction notes
When it came to sewing the dress, here’s what I did differently:
I sewed the neckline using interfaced facings cut from the same linen that I used for the dress. First I finished the facings with my serger, then I sewed them together at the back seam and shoulders, and attached them to the dress after sewing the dress shoulders together.
I finished the sleeve hems with store-bought bias binding. I did this because my sleeve alterations changed the sleeve shape such that it was not going to be easy to fold over the hem and stitch as called for in the pattern. I happened to have some bias on hand that matched the dress color, so I used that.
I like a substantial hem on a linen dress, and I wanted the dress to hit at my knee, so I turned up the hem 1/2″ and then another 1 1/2″. This effectively shortened the dress 1 3/8″.
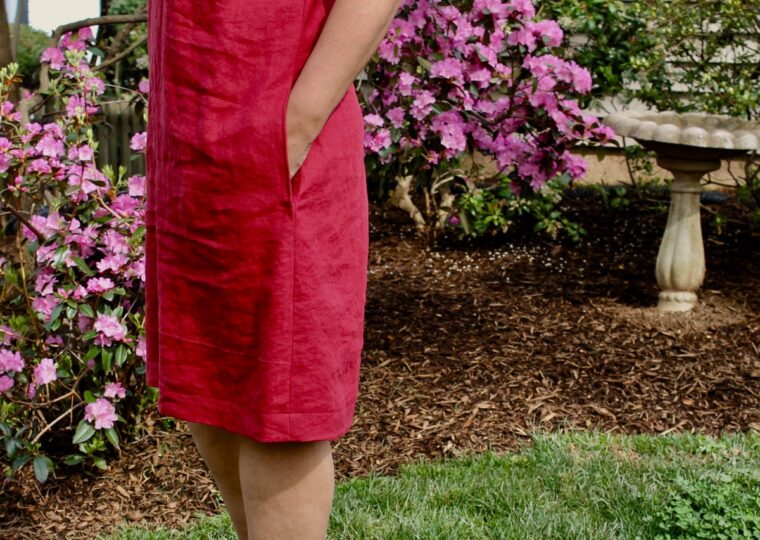
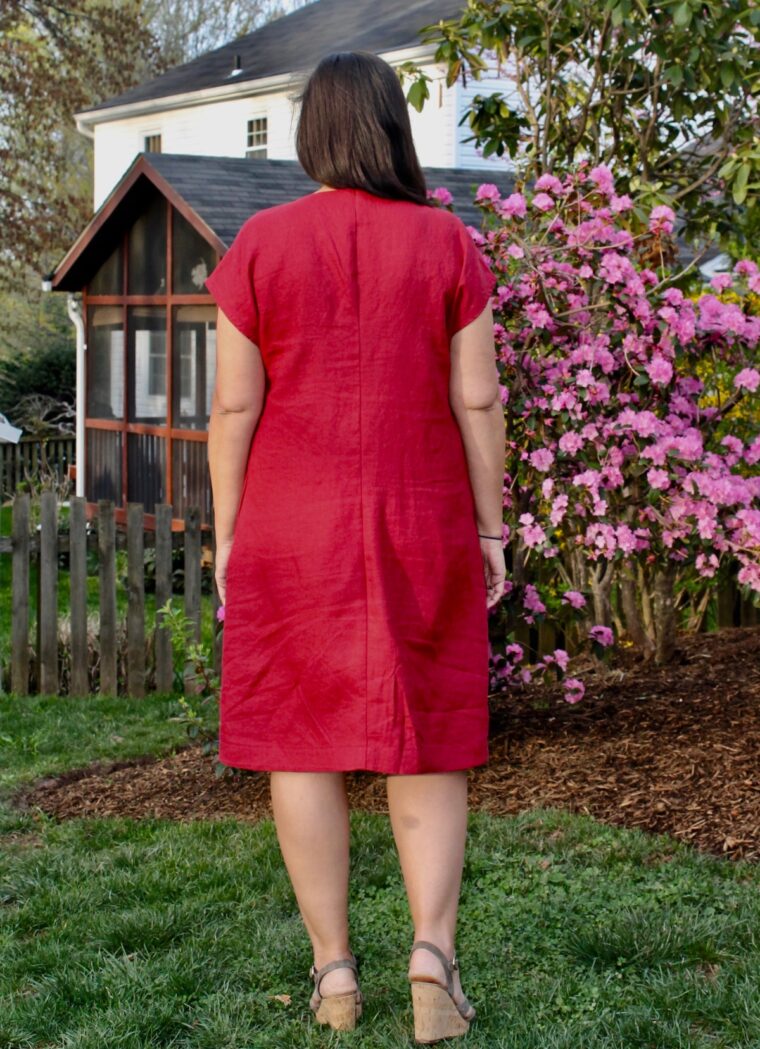
After I’d gotten the dress assembled, but before hemming, I tried it on and decided to take some volume out of the back. I ended up taking out 1 3/8″ from the back center seam starting from the hem, and tapering to nothing a few inches below the neckline.
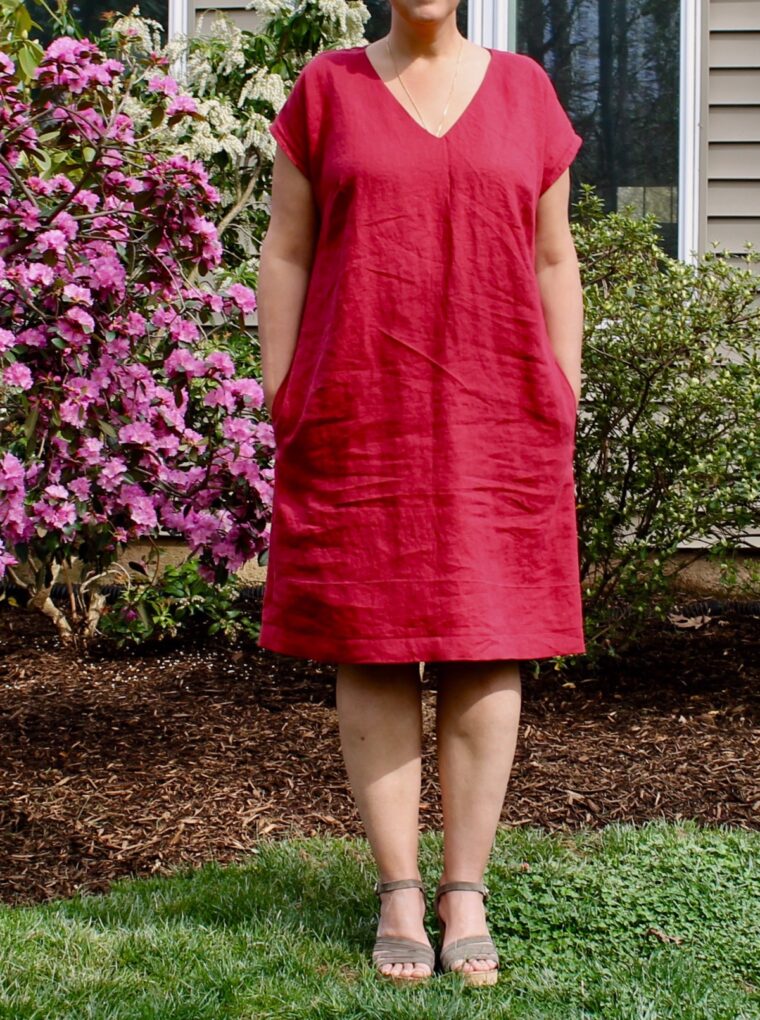
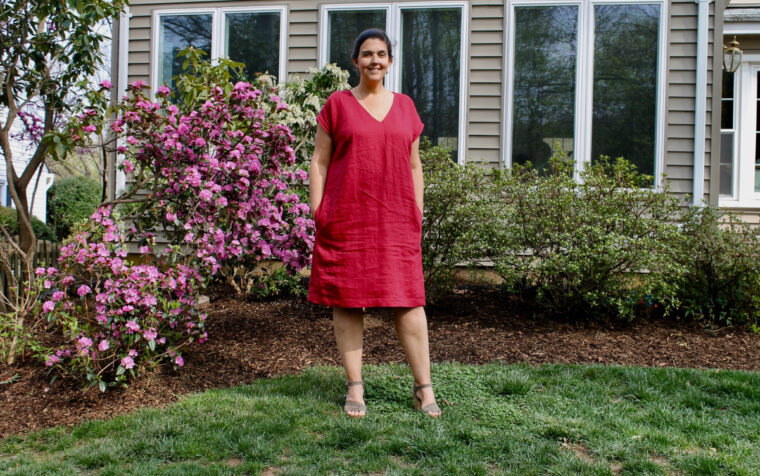
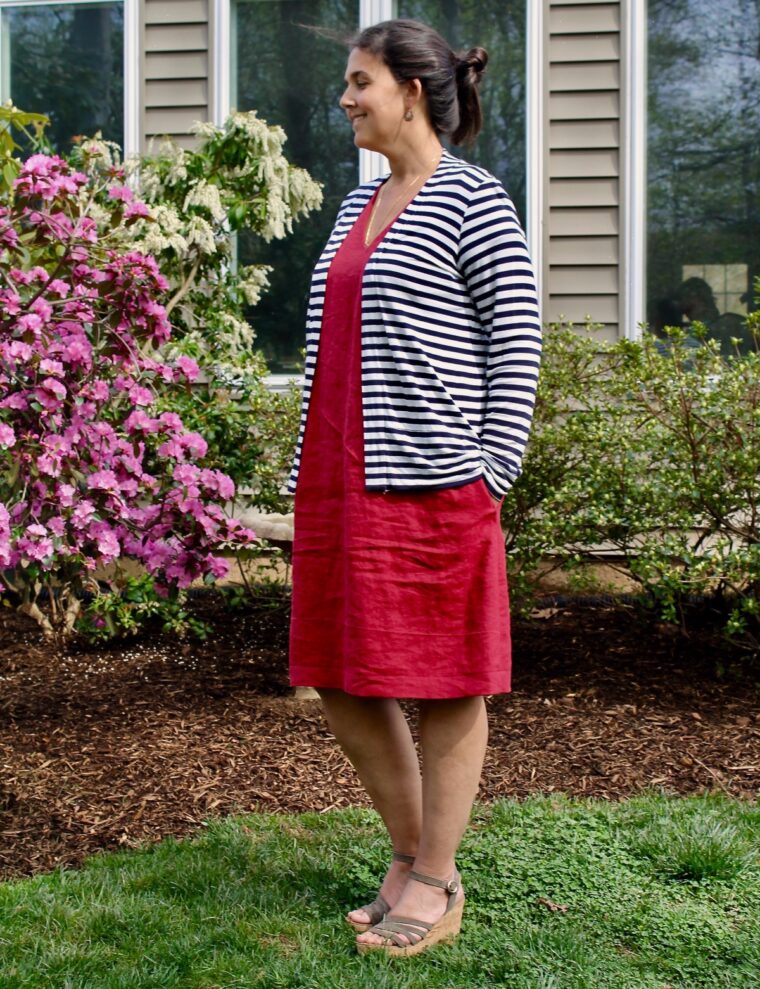
I’m really pleased with the resulting dress. It nails that relaxed vibe I was aiming for, and the fabric and silhouette combine to make a versatile dress that is really lovely to wear. I’ll style it for church with pretty sandals and a cardigan, and pair it with my leopard-print tennis shoes or thong sandals for running errands. And though I don’t think I’ll belt it (see mid-section issues above), I could if I wanted to.
Now, I’d like to make several more in different colors of the Fabric Wholesale Direct linen … which one should I choose next?
Giveaway time!
***The giveaway winner has been drawn via Random Number Generator, and it’s Gail K. Congrats Gail, and keep an eye on your inbox!***
Fabric Wholesale Direct is sponsoring this giveaway and is offering $100 worth of fabric to one lucky winner. To enter the giveaway, comment on this post. The giveaway will remain open for one week, through the end of the day on April 25. Then we’ll randomly draw one winner from the commenters and post the result here.
In the meantime, be sure to have a look at the beautiful fabrics Fabric Wholesale Direct has to offer. In addition to their linens, the colorful Madras plaids caught my eye. They’re perfect for another breezy summer dress!
(adsbygoogle = window.adsbygoogle || []).push({}); Â
Nonwoven Finished Product,Non Woven Finished Product,Non woven Finished Product,Non Woven Finishing Products
Sunshine Hygiene and Health Care Technology Jiangyin Co., Ltd , https://www.shhcnonwoven.com